Model Airplane Glue
In this hobby, model airplane glue is your best friend. Whether you're building your first plane or piecing it back together after a devastating crash, it's critical to know what adhesive to use for each application.
Much like duct tape, it's amazing what carnage can be cobbled back together when using the right glue.
While the more glue you use on repairs does add to the weight, a sluggish plane is most definitely better than no plane. Especially when you're broke and want to fly!
Cyanoacrylate Glue (CA)
Cyanoacrylate glue is what most of us call "CA" in the modeling world. CA is the "active ingredient" in super glues such as Crazy Glue. Ever gotten your fingers stuck together with Crazy Glue? Then you can just about imagine how strong concentrated CA must be!
This type of model airplane glue cures extremely quickly. This makes building a balsa wood RC airplane from a kit much much faster than the old days of waiting hours and hours for traditional wood glue (AKA Aliphatic Resin) to cure for each and every step of the build.
|
Special foam safe CA
is compatible with most foams. 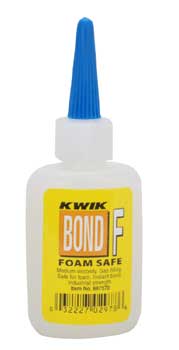 Use a small test piece to see how the foam will react before using any type of model airplane glue on your foam RC airplane. |
Keep in mind when using CA glue:
|
It's really a personal preference, but I've found that most people use CA to build their kits. As a matter of fact, the directions of most kits instruct you to use CA. However, there are many people who'd rather spend the extra time to build with acrylic glue because it's cheaper, there are no fumes, they have more room for error and less brittle joints.
There are basically three different types or viscosities of CA glue, which are thin medium and thick.
Thin CA
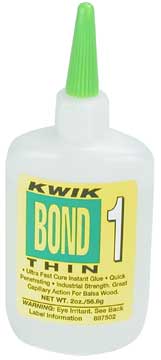 |
Thin CA has about the same viscosity of water which allows it to
"wick" or soak deep into balsa wood for a strong bond. This is what most people
use when framing up their model airplane kit. The balsa pieces are pinned to a
plan, and a drop or two of CA is applied to each joint. Thin CA is also used
with CA hinges for control surfaces. |
Thick CA
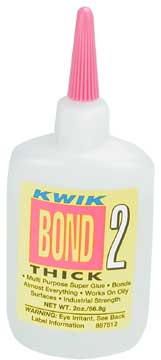 |
Thick CA has a very thick viscosity. This is sometimes referred to
as gap filler CA. This type of model airplane glue is good for joints where
there may be small gaps between the wood. Thick CA forms a stronger bond than
thin CA. It also takes longer to cure which gives you longer to position the
pieces correctly before it cures. |
Medium CA
 |
Medium CA has a viscosity somewhere in between thick and thin.
Sometimes the directions will specify this type of model airplane glue for
special applications. I personally always keep a bottle of medium CA on hand
because you can use it for just about any application if you're in a pinch. It's
also great for quick repairs at the flying
field. |
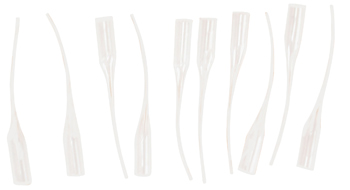
CA Applicators Tips
|
CA applicator tips are very convenient "tips" that allow you to apply glue neatly in very tight places. These applicators are really cheap and they do a
good job of keeping you from applying too much glue, which saves you money in
the long run. They also help prevent glue from getting on places where you don't
want glue! |
 |
CA Kicker
CA accelerator, or 'kicker', is catalyst that is applied to CA glue that causes it to cure almost immediately. Kicker is great for quickly tacking awkward pieces in place. It is awesome for making repairs at the flying field when you don't have a lot of time for waiting for model airplane glue to dry!
You don't want to use kicker unless you absolutely have to though. The problem with kicker is that it can cause the CA to cure before it has enough time to soak into the wood for a strong bond. Joints repaired by kicker can be very brittle.
You also want to make sure you don't get both CA and kicker on your skin at the same time. Mixing the two causes a fierce chemical reaction that will burn a blister on your hand. Trust me. Been there done that...
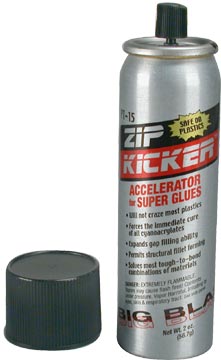
Kicker is applied by spraying it on the area where you want the model airplane glue to cure immediately
 |
|
This is accomplished by the use of an aerosol can like the aerosol zip kicker above. Or you can use a finger pump with a non-aerosol container like the zip kicker seen on the left. |
CA Debonder
|
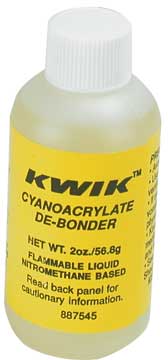
Anyone that's built a model airplane has probably had their fingers glued together or glued to something else at one time or another. Ca debonder is very convenient to have around for those "sticky" situations. CA debonder can also be used to separate pieces you have glued together by mistake if you apply the debonder quickly enough. Debonder does have limitations. If you've used plenty of glued on a strong joint such as attaching the stab to the fuse, don't expect CA debonder to be of much help getting it apart after its cured... |
 |
Two Part Epoxy Model Airplane Glue
Epoxy model airplane glue is much stronger than CA. It's also much heavier and takes an extremely long time to cure. Epoxy glue is most often used to glue two wings halves together. Since it cures so slowly, it allows plenty of time to make critical alignment adjustments. The wing joint is definitely a place where it is worth sacrificing some extra weight for additional strength!
 |
 |
Epoxy glue is basically used where an extremely strong bond is needed, or a place where you need plenty of time for tweaking the alignment before it cures. There is 30 min epoxy glue and 5 min epoxy glue . The time designation is the working time, not the cure time. Be sure to allow at least 24 hours for the any type of epoxy glue to cure before flying! |
Thirty minute epoxy gives you more time for alignment before the glue become to stiff to work with and it is also much stronger than 5 min epoxy. I always err on the side of caution and use 30 minute epoxy for most everything...
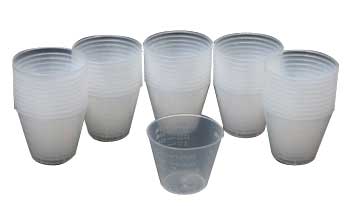
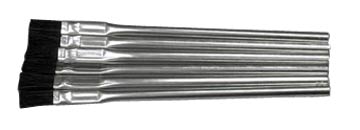
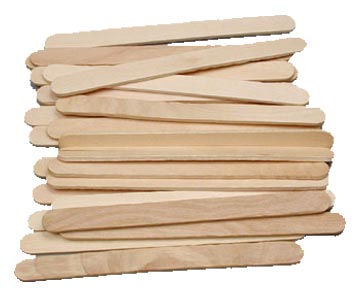
Two part epoxy glue has and aggregate and an activator that must be mixed together before applying. With a mixing stick, the glue is mixed in small mixing containers and applied with a brush.
 |
 |
 |
Canopy Glue
Canopy glue is the type of model airplane glue used to attach canopies to an RC airplane.
|
|
Many times the canopies are nothing more than a bubble of plastic that is glued right to the covering of the fuselage.Canopy glue is clear when it cures so that you don't see the glue between the covering and the canopy. At first glance, canopy glue seems a lot like regular Elmer's white glue. But canopy glue is more flexible when cured and is also water proof, unlike Elmer's glue. |
Thread Locker
|
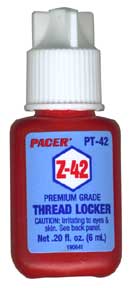
Thread locker is not model airplane glue, but it's an important adhesive none-the-less. Because of the vibrations associated with our glow engines, and even electric driven props, it is very important to use thread locker on critical bolts that you can't afford to have come loose. Thread locker is used on engine mounting bolts, motor mounting bolts, landing gear bolts, and any other hardware that may vibrate loose. |
 |
Model Cement
Model cement is another type of model airplane glue that is used for gluing plastic pieces together. This is the same type of glue used for building plastic display type model airplanes and cars.
|
|
Model cement is handy when building scale models with that require strategic placement of tiny plastic non-functioning parts.
If you've ever put together a small display model then you know first hand
that this type of model airplane glue also has a strong odor and should be used
only in well ventilated areas. |
Gorilla Glue
Maybe not a model airplane glue per se, but it wouldn't be fair to you if I didn't tell you about Gorilla Glue!
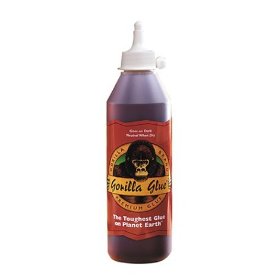 |
This stuff is absolutely great for repairing foam airplanes. The nose of my ParkZone T-28 completely broke off from the fuse when I drilled it into the ground. Now it's just as strong as ever after I glued it back with Gorrila glue. After a little touch up paint on the seem, you can't even tell it was crashed! |
You have to be careful not to apply too much though. Once applied, it expands as it cures into a hard foam-like substance. You can pick it up just about anywhere. Highly recommended for foam repairs...
Similar pages that may interest you...
If you're researching glue, I have a feeling you might enjoy these articles below as well. Build on my friend!
- Different RC Airplane Forms
- Building RC Planes - Chipmunk Build Thread
- Warbird RC airplane plans
- Free Model Airplane Plans
- Model
Airplane Decals
Home > Building RC Airplanes > Model Airplane Glue