Model Airplane Decals
Want to show up at the flying field with a unique creation that grabs people's attention. Model airplane decals can make your ARF or Kit shine!
Water Slide Decals
Water slide decals are are what comes with most of your ARF's and kits. They're really easy to apply, but if you're not careful in taking the time to apply them correctly you'll end up with a mess.
Nothing looks worse than decals full of bubbles and wrinkles that start peeling off after the first flight!
Needed Supplies
|
A water slide decal is nothing more than ink printed on a special paper with a water based adhesive. And of course it has a protective coating that makes it shine. If you don't like the decals that came with your airplane you can easily print your decals with an inkjet printer on decal paper. |
Obviously the first step of applying your decals is to cut each one from the sheet with a pair of sharp scissors or exact knife.

It's very important that whatever you use for the cutting that it be very sharp. A dull edge will end up ripping through the paper and stretching the decal.
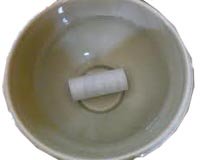
Place the decal in the bowl of lukewarm water for about 5 seconds. Leaving the decals in the water for too long will damage or dissolve the adhesive. So it's important to only leave the decal in the water for a few seconds.
The decal will probably curl up a little bit, that's normal. Set it aside while you prepare the surface of the airplane.
Use a paint brush to apply Micro Set generously to the area where the decal will be placed. This prepares the surface for a strong bond between the airplane and decal.
Slide the decal off the backing paper just a tiny bit with your thumb and index finger. Place the exposed front edge of the decal on the airplane where you have prepared the surface.
Once the front edge is positioned correctly, slide the backing paper out from under the decal. It's important that you slide the backing paper and not try to slide the decal as you will wrinkle it.
Dip the second paint brush into the lukewarm water. Use this brush to gently chase any bubbles or wrinkles from the decal. Start from the center and brush towards the edges.
The last step is to dampen a paper towel and blot up all the access water on and around the decal. It doesn't have to be perfect. Keep in mind that the decals will
shrink as it dries which will get rid of any any small wrinkles or
imperfections.
Microscale Industries
Microscale Industries makes a couple of great products for applying water slide model airplane decals
Sticky-Back Decals
Sticky-back model airplane decals also come on one large sheet, but they are more like stickers. They don't need to be soaked in water to activate the adhesive.
I usually mix a little bit of dish soap with some water in a squirt bottle. Moistening the surface prior to installing the decals allows you to move them around and get the placement just perfect.
Once you get it where you like it you can use a credit card to push out any wrinkles and bubbles.
You don't want to use any kind of heavy degreaser type of soap. I normally just use a couple squirts of the hand soap from the kitchen.
Allow plenty of time for the water to evaporate and the decal to dry before adding any clear coat.
Dry Transfer Decals
Dry transfer decals are similar to water slide decals, except they are applied without any water or solvent.

The above image is worked done by GetStenscils.com
The graphic itself is contained on a plastic transfer backing sheet. This backing sheet is placed face down on your airplane where you want the graphic to appear.
The image is transferred from the backing paper to your airplane by running the back of the backing paper firmly with semi-sharp object such as a pen, pencil, or stylus.
Helpful Tip
If applied correctly, all of the above types of model airplane decals can be made to look as if they were painted on by hand. The secret is to coat your airplane with a glossy finish prior to applying these decals.
If applied to a "dull" surface, there is good chance you will be able to see the transparent film around the outer edges of the decal.
Vinyl Model Airplane Decals
Vinyl decals are becoming very popular with RC airplanes. This is the same material used for automobile decals. These are easy to apply and are great for standing up to glow fuel, gas, and sun exposure.
You can make them yourself, or you can design a graphic yourself and have a graphics company make the decal for you.
Vinyl model airplane decals are much thicker than slide-on or sticky decals. They are not good for fine details where you want to make it look like the decal is painted on. In other words, they aren't going to work for putting the fine details on your scale plane.
Pre-made vinyl decals will obviously be much cheaper than custom made ones because they are mass produced.
Custom Vinyl Decals
Bandegraphix
is one of many online vendors that allow you to design your own vinyl
decals with software on their website. Below is the tutorial video on how to use their website to design your own graphics.
Once you finish your design they
will make your model airplane decals and mail them to you. Do a quick
search on the net for "custom vinyl decals" and you will find several
good companies that offer similar services.
Clear Coating
There is nothing worse than having your model airplane decals wipe off with the fuel after the maiden flight or a few flights later. I speak from experience!
So it's important that you fuel proof your decals if you fly glow or gas powered planes. It's not a bad idea to throw a clear coat over your decals even if you fly electric.
 |
 |
I usually spray my decals down with Top Flite Clear LustreKote . It is very cheap and has worked well for my planes.
Some folks use Krylon clear coat, the type you can pick up at any department store. This is probably OK for electric powered planes. But I wouldn't recommend it for nitro powered planes because it will not hold up to prolonged exposure to nitro fuel.
Diehard modelers who spend thousands of dollars on their RC planes, like the turbine jet guys, often use much more expensive automobile grade clear coats for the best results.
Related Pages...
- Different RC Airplane Forms
- Building RC Planes - Chipmunk Build Thread
- Warbird RC airplane plans
- Free Model Airplane Plans
- Model Airplane Glue
Home > Building RC Planes > Model Airplane Decals
Let’s Go Flying! |
|
5 Steps for Successful First Flight! When the RC bug bites, it bites hard! Control yourself my friend! Save yourself much time and money by following these five steps to success! |
